FUN WITH POWERSHELL
CONTENTS
Introduction Running PowerShell console Microsoft PowerShell ISE Security Modes of PowerShell Cmdlet Working with PowerShell scripts Variables Array Declaration Conditions Condition Statements Syntax for If, If-Else and If-ElseIf-Else : Syntax for Switch: Loops Do-While loop For loop While loop Functions Example to show strength of PowerShell Objects PowerShell known objects Pipeline Foreach-Object Example ForEach-Object Foreach Example Running Scripts Modules Connecting IIS and PowerShell Configuration Editor in IIS
Introduction
PowerShell Script is one that enables task automation by running in the background collecting system related data out of which information can be extracted. PowerShell scripts become helpful in cases like, collecting huge amounts of performance related data either locally or remotely. This would enable .
Let’s Get Started!!!
Running PowerShell Console
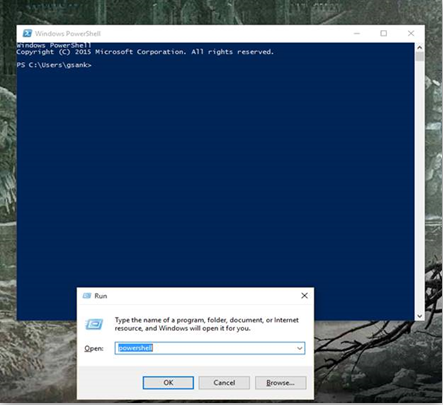
Option 1:
Opening a PowerShell can be done in multiple ways:
- Go to Run –> Type “PowerShell”. The PowerShell windows opens up
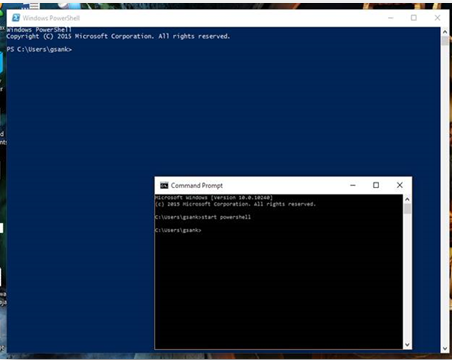
Option 2:
- Go to Command Prompt and type “start PowerShell” to get the PowerShell window.
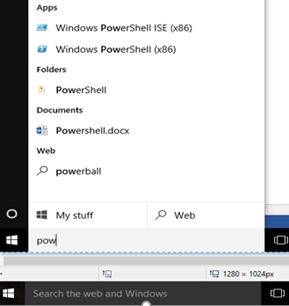
Option 3:
- Go to Start Search for PowerShell in the Search bar and click the Windows PowerShell listed there.
Now that you are able to open the PowerShell console, you are good to go with running the scripts and cmdlets in it.
Microsoft PowerShell ISE
Alternatively, Windows PowerShell ISE can be opened. ISE can be considered as a PowerShell IDE, to make scripting even more user-friendly and interesting!!!

As seen in the below figure, the left pane is divided into two segments, the upper part can be used for writing script and run them on the fly. The output gets displayed in the bottom part, in the console!!
Also, you can search for the cmdlet you are searching for in the right pane. Choose the required cmdlet and input the parameters directly in the GUI and click the Run button at the bottom of the right pane.
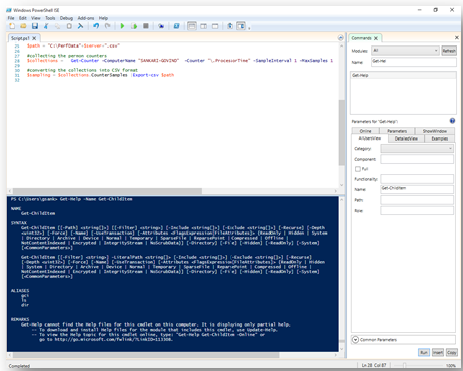
Much simpler isn't it! You can save time and run an efficient script this way.
Now that you are able to open the PowerShell console, you are good to go with running the scripts and cmdlets in it.
Security Modes of PowerShell
PowerShell can also provide protection to the data allowing only the secure scripts to run in the console, using the Execution Policies. The following are the list of execution policies. These are the parameter values that can be included with the cmdlet. For example,
- Restricted- No scripts can be run. Windows PowerShell can be used only in interactive mode.
- AllSigned- Only scripts signed by a trusted publisher can be run.
- RemoteSigned- Downloaded scripts must be signed by a trusted publisher before they can be run.
- Unrestricted- No restrictions; all Windows PowerShell scripts can be run.

The command Get-ExecutionPolicy –List lists the list of users and the corresponding policies that is currently active.
Let’s learn the language of PowerShell!!!
Cmdlet
Cmdlets are Commands/Statements in PowerShell that make a PowerShell script. We will take a look on how to write the cmdlets and their structure.
Every cmdlet has the format of,
<verb/action> - <noun>
For example, you would have noticed a common cmdlet,
Get-Help Get-ChildItem 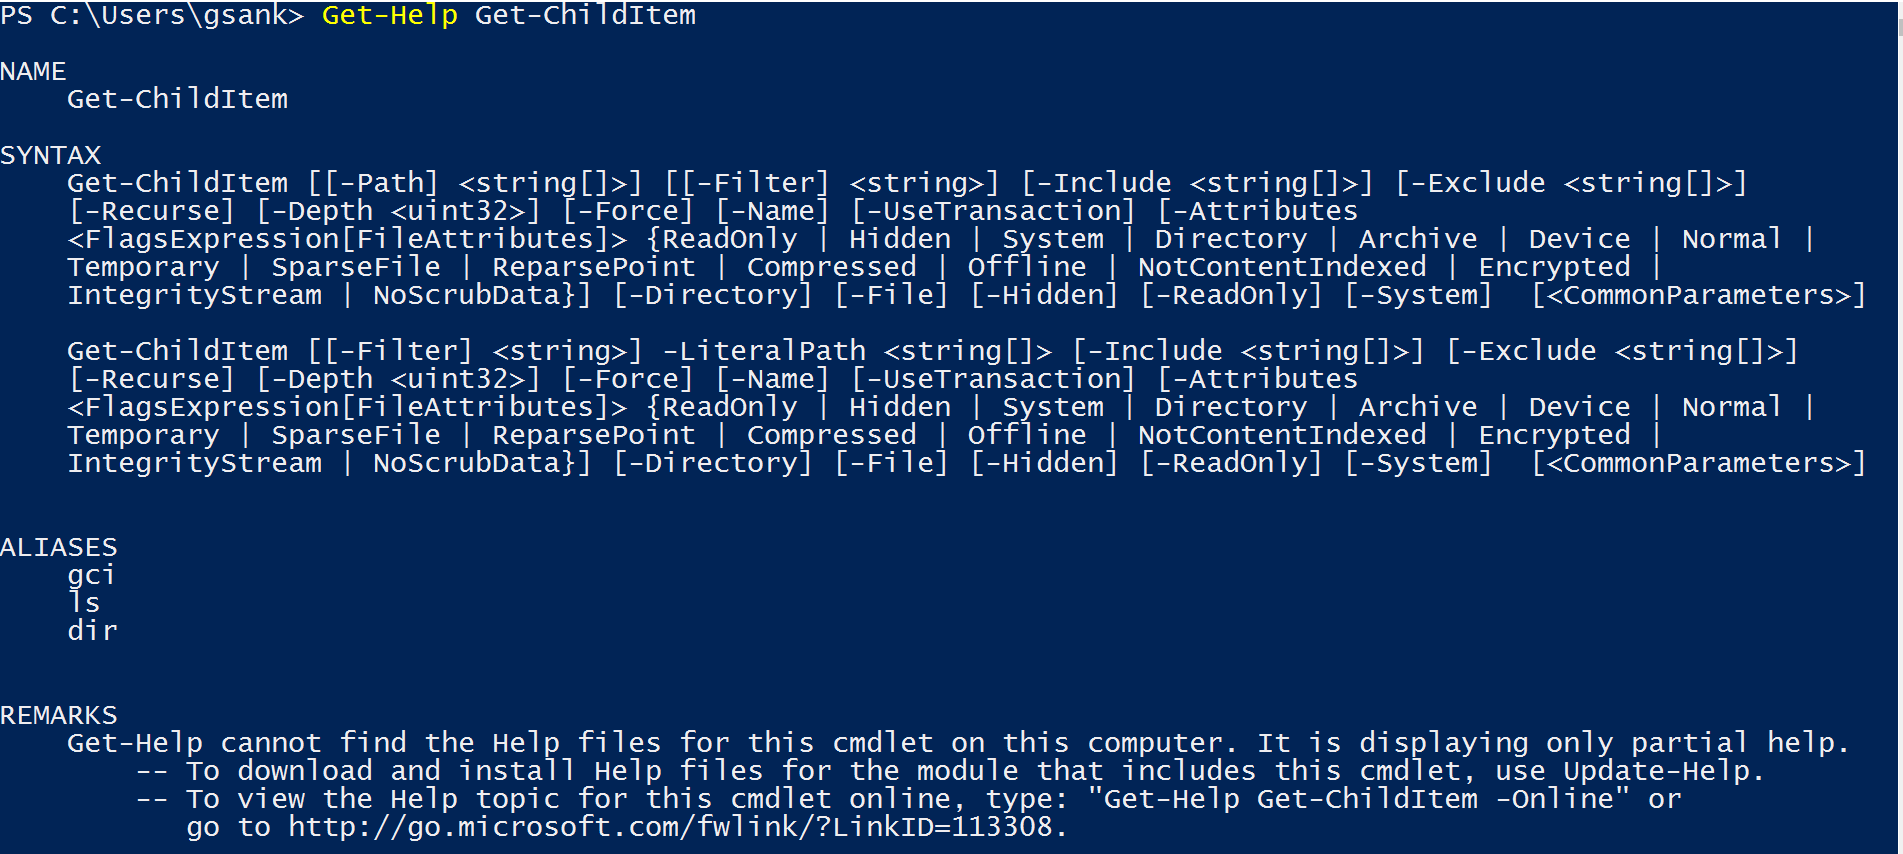
Working with PowerShell scripts
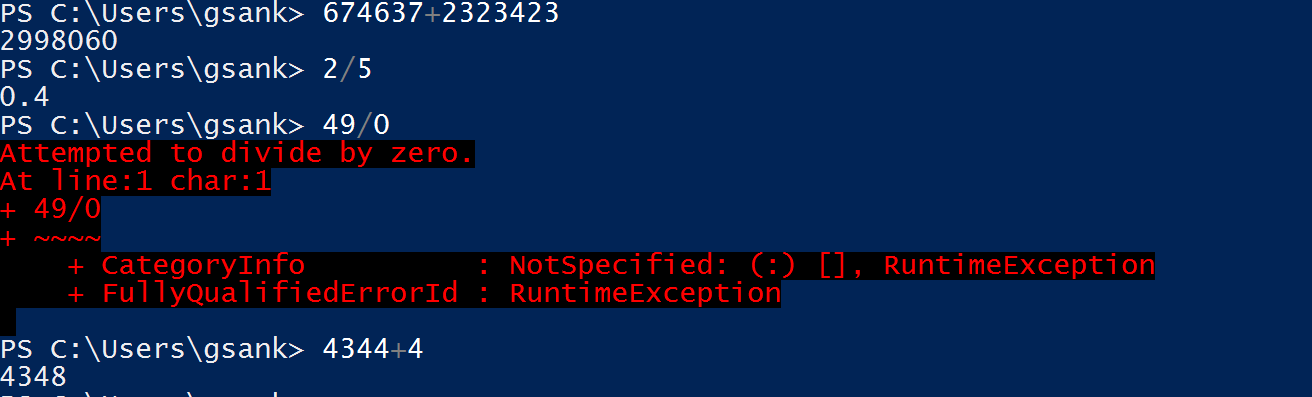
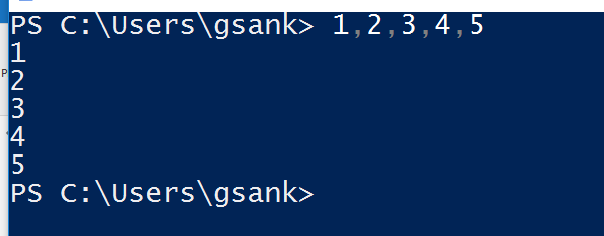
Let’s start with simple Arithmetic Operations can be performed even with no variable declaration!!!
The value and the operation can be input in the console directly and the result is obtained on the fly.
Example:
Variables
Variables in PowerShell are declared by '$'. PowerShell takes up the .Net Framework datatypes but can also be declared without mentioning the datatype, based on the value assigned to the variable the type is resolved by the PowerShell itself. Data types can be declared as [<datatype>].
Syntax for declaring a variable would be,
[<datatype>] $<variableName>
Example:
[int]$sum, here we have declared an ‘int’ variable named as ‘Sum’.
Let’s, try to perform arithmetic operations by using variables: 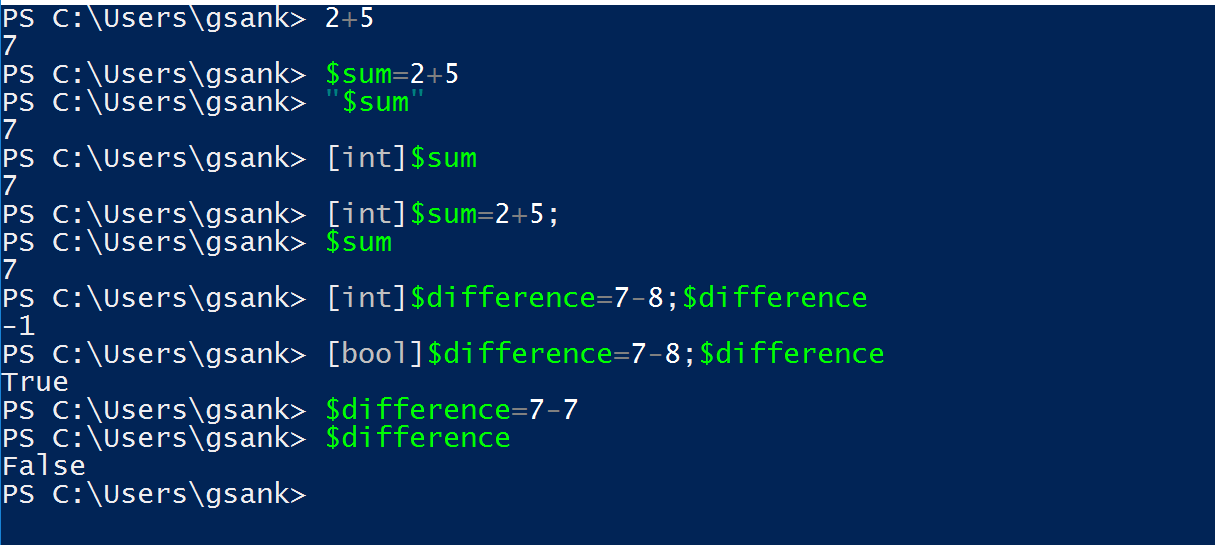
Array Declaration
Array declaration can be done in one of the following ways:
- $<arrayName>=@(“value1”, “value2”,…”valueN”)
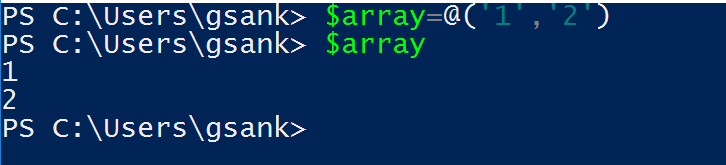
It is as simple as that!!!
- $<arrayName>=@()
$<arrayName>+="value1"
$<arrayName>+="value2"
.
.
$<arrayName>+=”valueN”
- Whenever a value is separated by comma, it is again considered to be a separate array by PowerShell
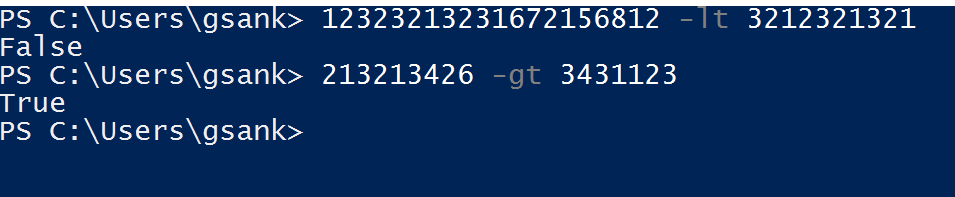
Conditions
Unlike the regular conditions, where the relative operators are being used, in PowerShell scripting, the conditions use the alias form of the relative operator i.e.;
- -eq for equal
- -ne for not equal
- -lt for less than ; -le for less than or equal to (similarly –gt and –ge )
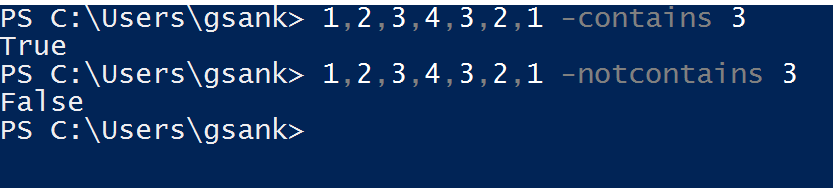
- –contains and –notcontains if a number is present in a set or not
- Comparing single values,
- Comparisons on an array or collection
Comparisons can also be done between array and collection, in such cases, the comparison is done with the entire list.
For example, to search if an element is present in an array or not, input the element say Key, now Key is searched against the entire list, element by element.
The command would look like, 1,2,3,4,3,2,1 -contains 3 result will be True
Next we will move on how to use these conditions in the condition statements.
Condition Statements
Condition statements follow the same constructs as in other programming languages. First we will see about If, If-Else and If-ElseIf-Else statements.
Syntax for If, If-Else and If-ElseIf-Else
If(condition) {set of statements}
If(condition) {set of statements} Else {set of statements}
If(condition) {set of statements} ElseIf (condition) {set of statements} Else {set of statements}
Something to note here is the If, ElseIf and Else keywords have the first letter in uppercase. The Condition used are as mentioned in the previous topic. For example,
If ($a -gt 5)
{
"Hello World"
}
This simply means that, “If variable a is greater than 5 then print Hello World”. Thus, it is nothing fancy about the PowerShell script, they are tending to make life simpler!!
Syntax for Switch
Switch statements are even simpler,
$value = 1
Switch ($value)
{
1 { "Number 1" }
2 { "Number 2" }
3 { "Number 3" }
}
Unless other constructs, the PowerShell Switch statement neither includes the "case" keyword nor a ":" after the "casenumber". Though the readability is lesser in this, programming becomes easier.
Example: 
Also, unlike the other languages, condition checking can also be done between a range of values, say, {(($_ -gt 6) -and ($_ -le 10))}.
This compares all the numbers that are greater than 6 and less than or equal to 10. Here, "$_" takes the value locally passed to the switch-case.
Example: 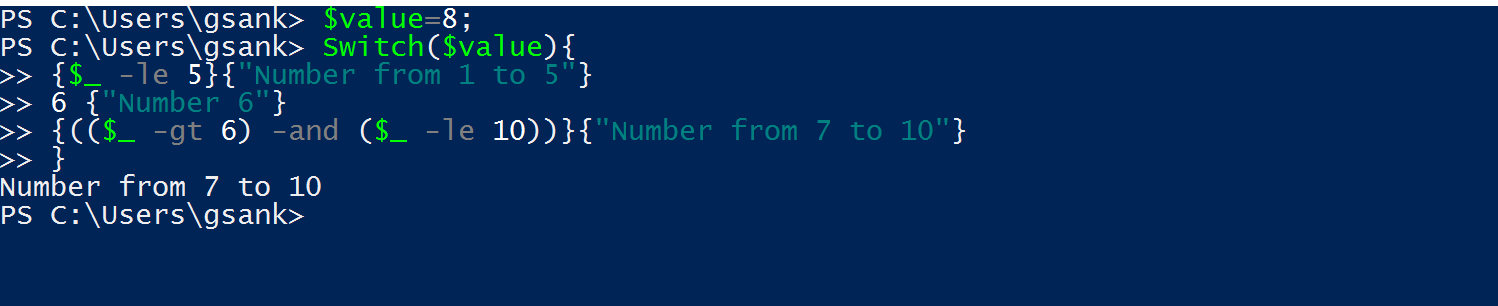
Switch-case can be used with “String input value as well”.
Example: 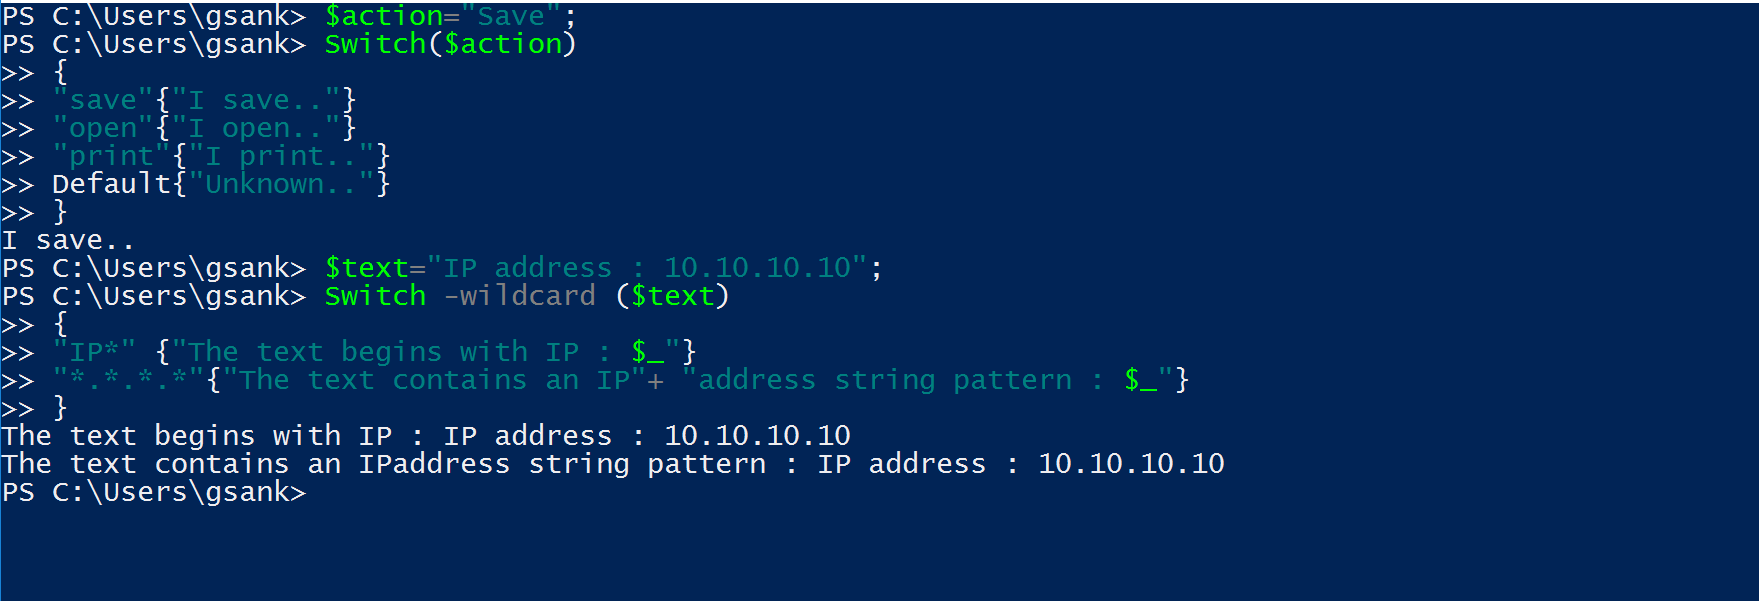
The -eq comparison operator are "not case-sensitive" and hence the upper case and lower case are both treated equal.
Not only the integers and string values, wildcard characters and regular expressions, which are otherwise tedious operations are made simple in PowerShell. For which, the -like and -equal keywords can be used.
Example: 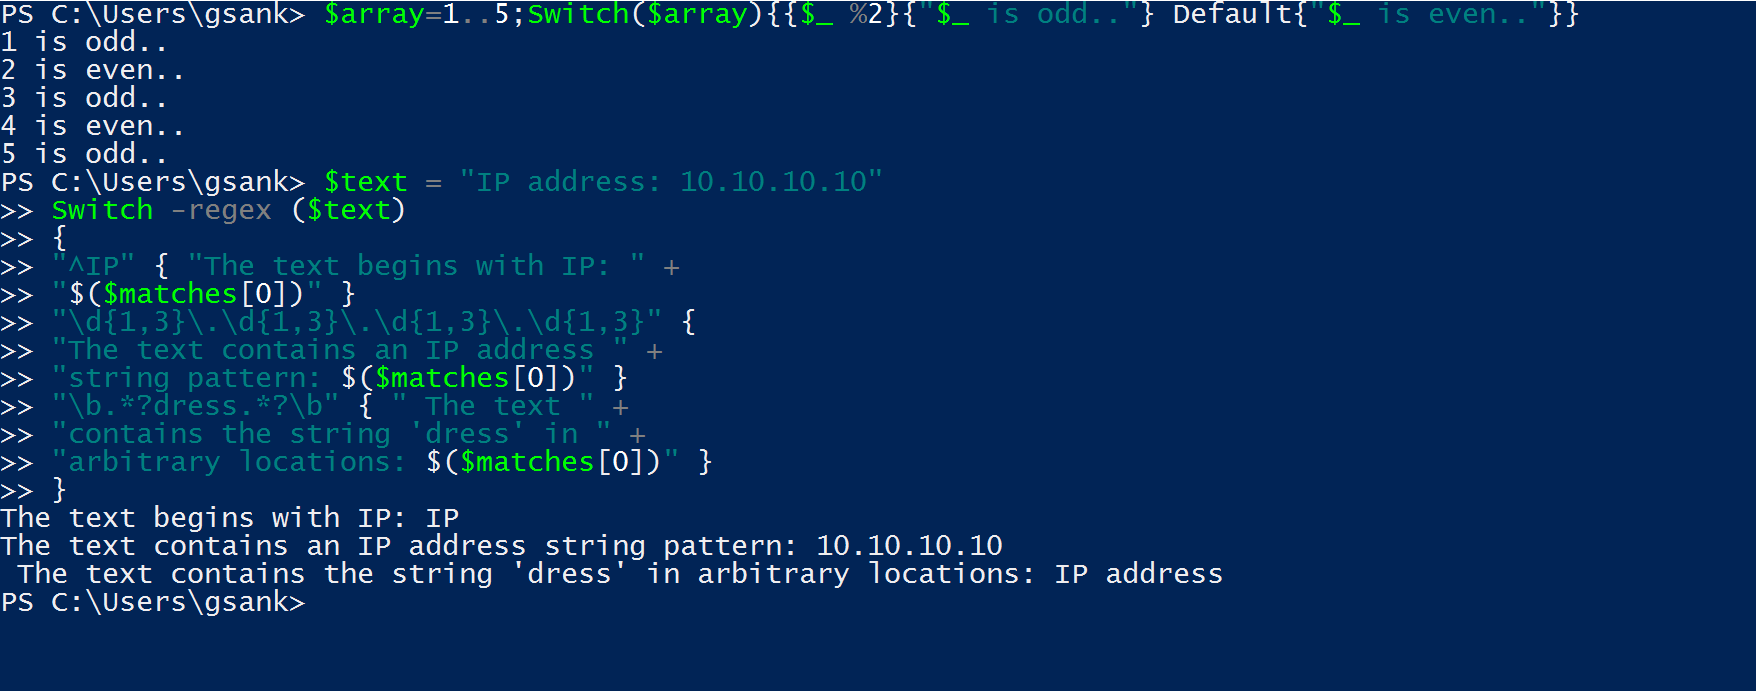
Note: As seen, the switch - case executes all the possible conditions, as there is no break” statement.
Loops
PowerShell has the following looping statements,
- Do-While
- For
- While
- Foreach-Object
- Foreach
We will explore each one in detail, except the Foreach-Object and Foreach which will be dealt in the later sections.
Do-While loop
Syntax:
Do
{
<set of instructions to be executed>
} While (<condition statements for executing the loop>)
Example: 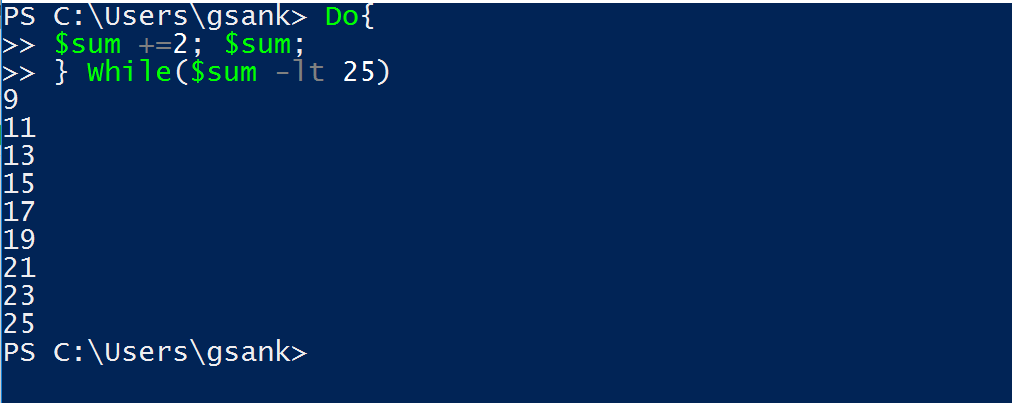
For loop
Syntax:
for (<initial condition>; <condition statements>; <action to be performed after one execution>)
{
<statement of instructions>
}
Example: 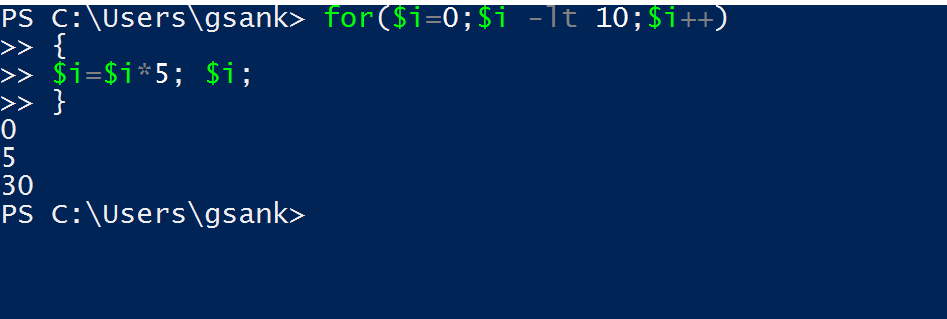
While loop
Syntax:
While (<condition statements>)
{
<set of instructions to be executed>
}
Example: 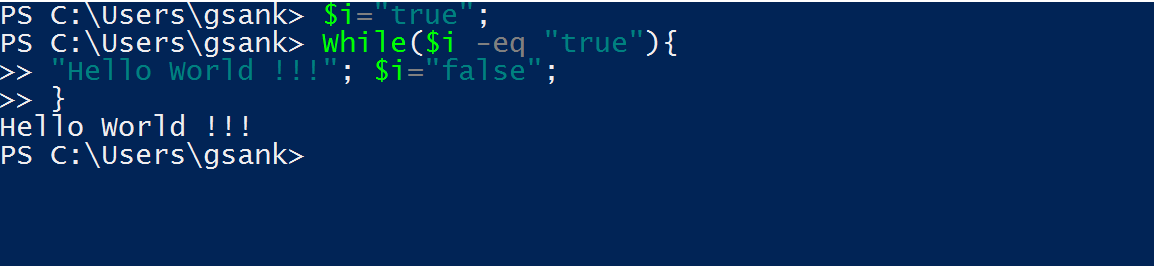
We end up the loop section with the favorite Hello World program !!!
Functions
Functions become handy when a command has to be used many number of times. The commands may be lengthy, and calling the function just like in other programming languages, with or without passing the parameters, may help the script execution faster making life easier.
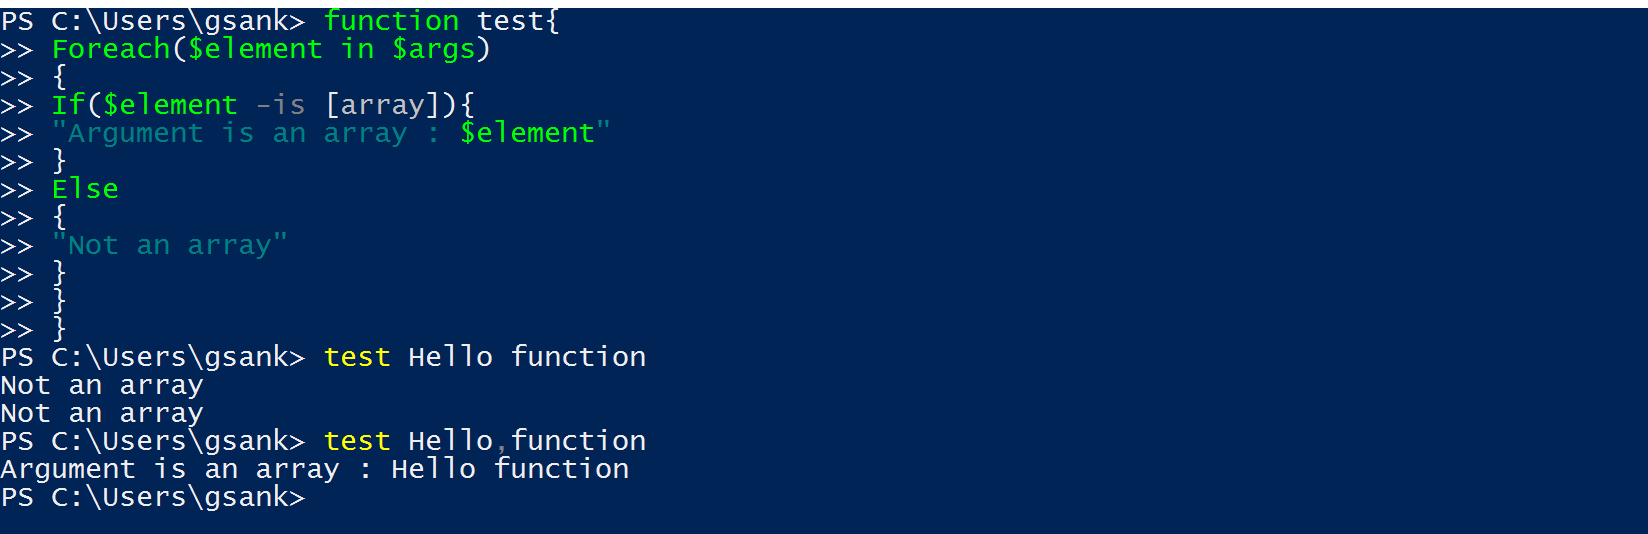
We have now executed a simple function to find if the argument passed is an array or not. The arguments to the function are passed through the command line.
In the first figure the arguments passed is: Hello function, note there is no comma in between “Hello” and “function” and so the output is “Not an array”.
In the second run, there is a comma between the values passed and as already discussed the values separated by comma is considered to be an array and hence, the output is “an array”.
Example to show strength of PowerShell
Let us take a look at another real time example,

In the above case, the function is going to ping the same ip address again and again in loop. But in case if different ip addresses need to be pinged, say health checking if the network is alive or not then the following can be done.
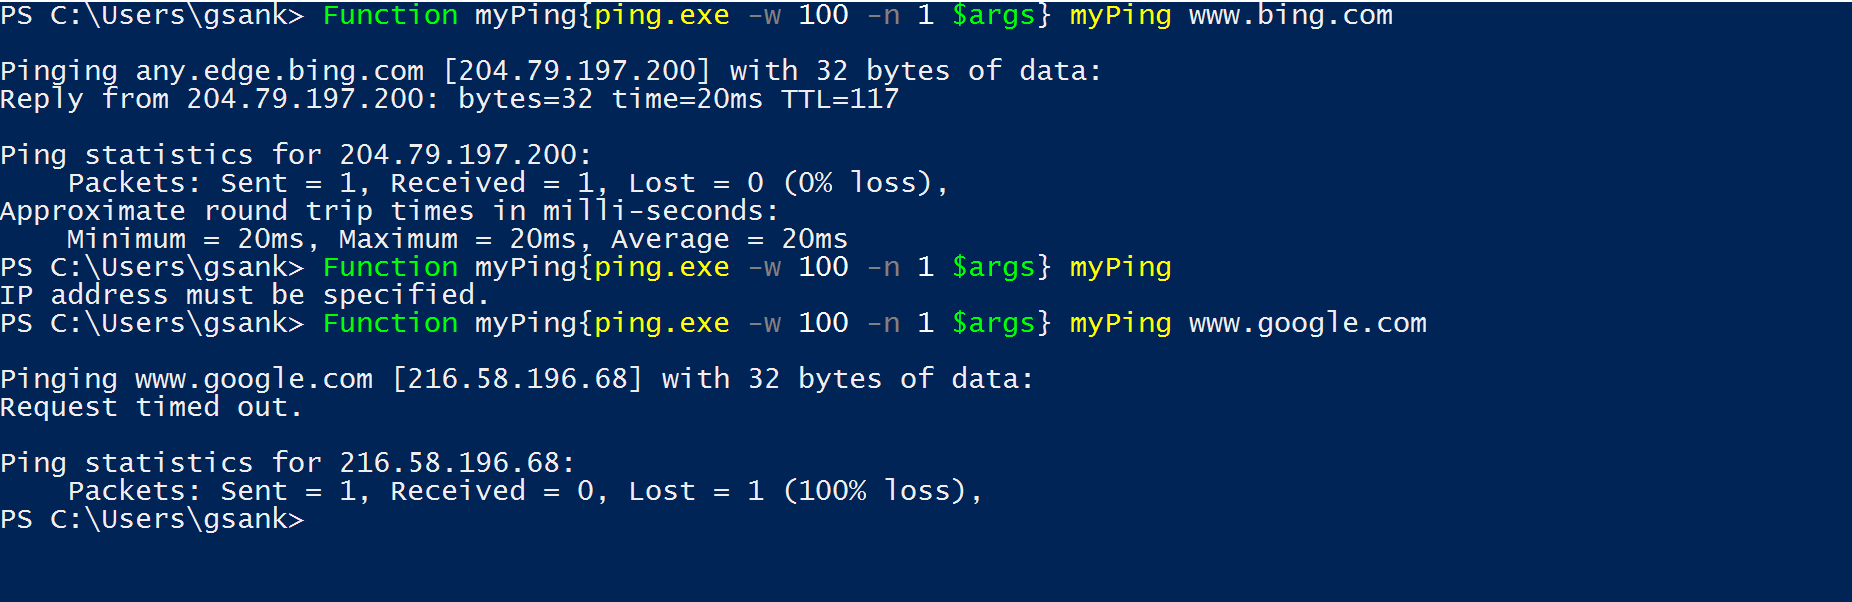
Now in the above script it can be observed, any site name can be passed in as the argument. The name then gets resolved into the corresponding ip address and the "ping" command gets executed.
In the case, where there is no argument is being passed message stating "IP address must be specified" is displayed.
Thus, PowerShell allows for the simple scripting of the functions, which can be greater use!!
Objects
Objects in PowerShell are just a way of representation of something. In other programming languages like Java, the class gives the structure and realization is done by creating an object. In other words, objects can be said as the combination of Properties and Methods.
As PowerShell works with the underlying .Net framework, all representation are done using Objects.
Now let us consider a simple real world object. Consider a cup, how you describe the cup becomes the Property and what can be done using a cup becomes the method.
Let us now create a virtual Cup object using PowerShell,

All the PowerShell system knows is that "cup" is an object that has no properties and methods. Now let's add properties to it.
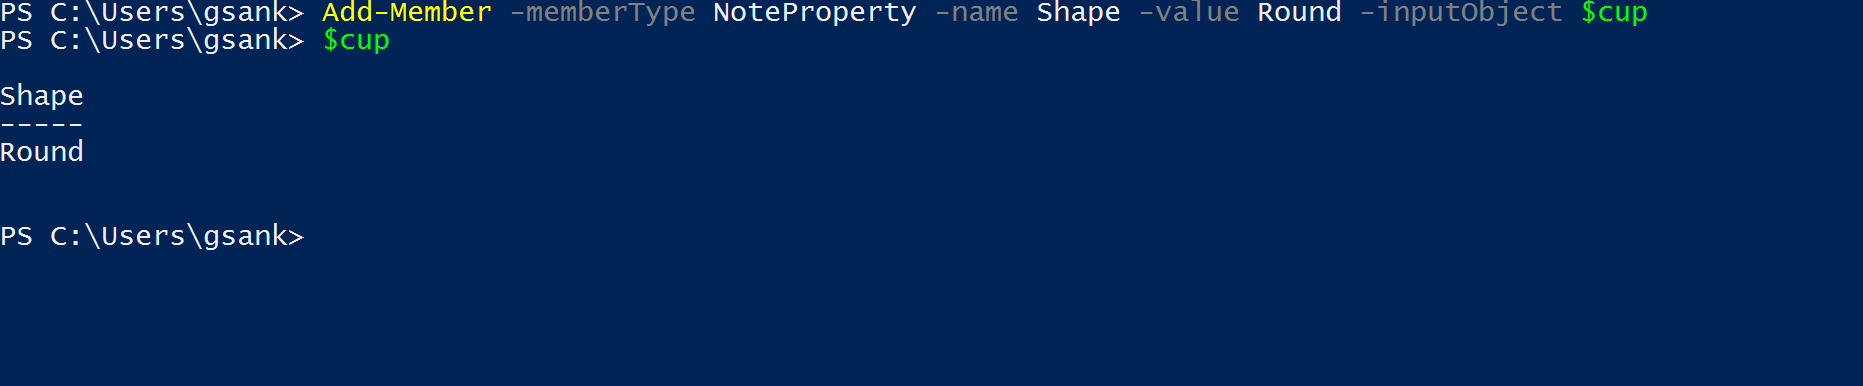
Here, "memberType" is set to NoteProperty which means it is the creation of property for a .Net object. There can be other properties like, ScriptProperty, CodeProperty , which we will not look into now, as our intention is to understand what an object is and how it works.
The other parameters are quite clear like the name and value. You give some property name and some value to the property.
Now when you try "$cup" what we see is different, the property gets displayed. It is understandable that, PowerShell knows that "cup" is no more a simple object without any value but has some property in it.
Properties can be deleted as well,

Here, we have added the “SidesOpen” property. If we find it irrelevant we can remove as shown in the below figure,

Next, what is the round cup going to do? Specify that by adding methods,

All that we have done is given some work to the “cup” we have created. By using the ScriptMethod , as the name suggests, the method has got some instructions to run when it is been called. The rest like the name and the action parameters are the same as that of property.
Running this method would give the following output,

There we go!! “cup” is now working. We created an object, have some details of how it has to be and what it has to do, when someone asks to perform a specific action. Custom object is created!
PowerShell known objects
Let’s try running PowerShell known objects. For example, we’ll take, $host,
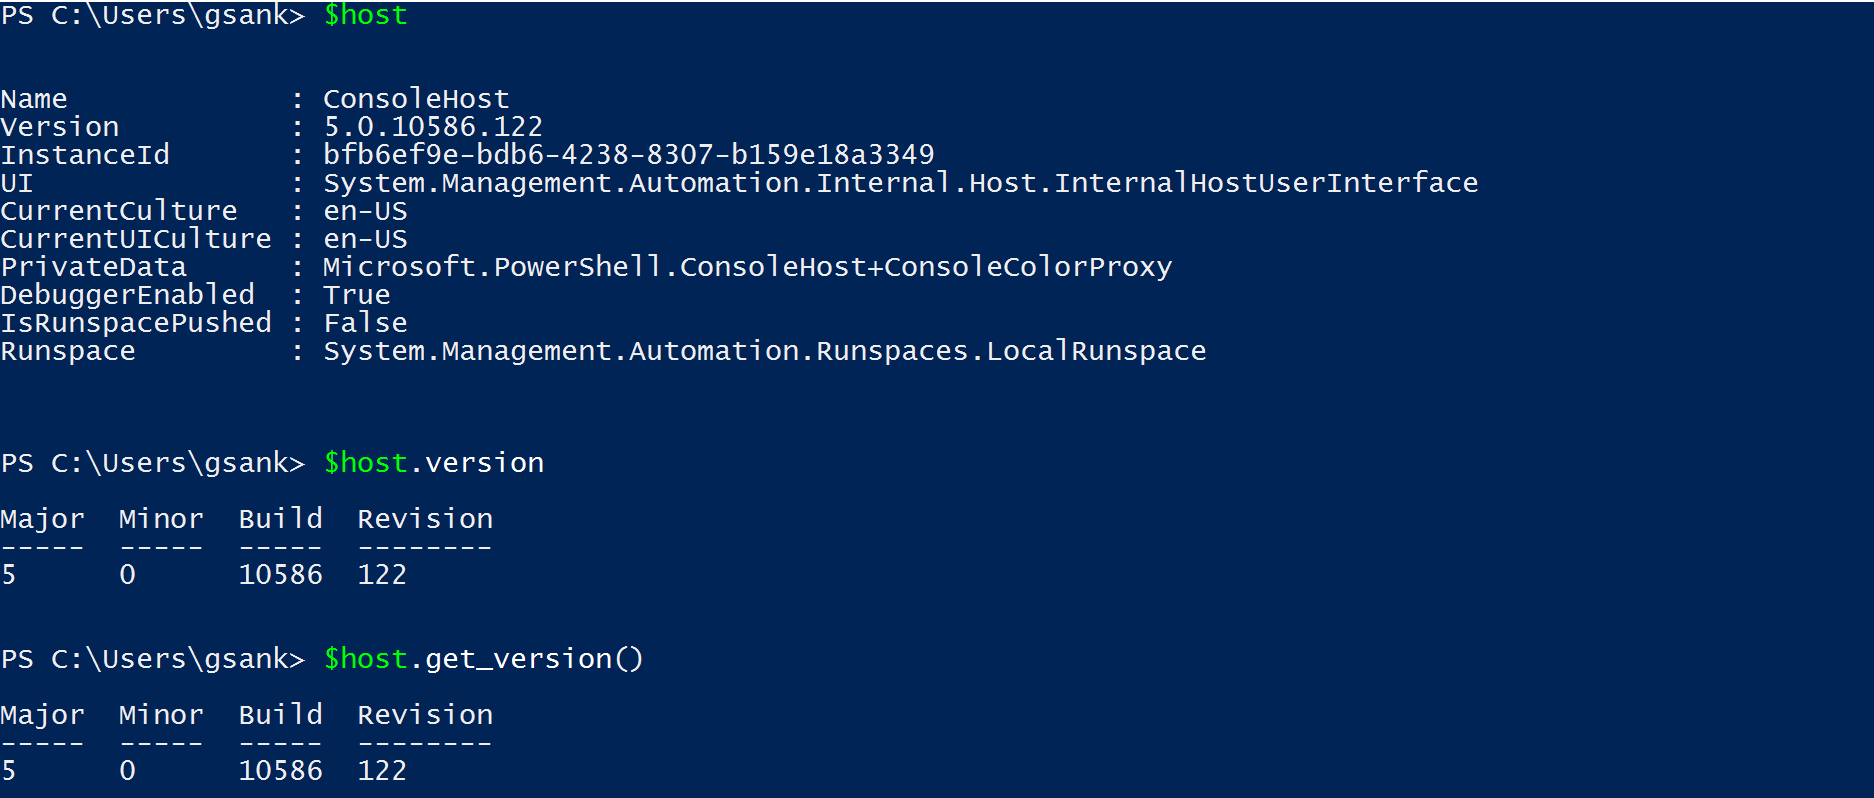
We have done the same set of steps we tried with our “cup” object. These known objects can even be customized! PowerShell lets the user to be more independent, with minimal restriction! Awesome isn’t it!!
Pipeline
Commands executed in the traditional shells produce outputs as “text”. In PowerShell, the output produced are “objects”. If an output from one command has to be passed on to another command in the same execution, we can use the pipeline operator ‘|’.
Just think of the operator acting as a connector between two commands, having open ends on both the sides, receiving the information from one end passing to the other for further processing.
Syntax:
Command1 | Command2
This means that the output of the command2 will be passed as a parameter to command1 or vice versa.
Example:
We will relate with the above “cup” object,
Instead of writing a long command to add a property to the “cup” object:
Without Pipe: 
With Pipe: 
The | operator does all the magic!!
Foreach-Object Example
ForEach-Object works best in a pipeline, where each result is returned by the preceding command.
In simple terms, when one command processes and has a collection of object, ForEach-Object takes each object one by one from the collection and pass it to another command for further processing.
Combining the above concepts of Objects and the Pipeline operator we will look into a real time example to use Foreach-Object
ForEach-Object
For-each object enables the cmdlet to execute a command or a block of commands for each and every single object that passes through the pipeline. As mentioned previously, the current value can be accessed using '$_', at any point of time.

As mentioned earlier everything in PowerShell is treated as objects. So here For-Each loop is executed for individual objects, and the cmdlet is ForEach-Object. This means for every iteration, the ForEach picks up one object and processes accordingly.
In the above figure, the cmdlet Get-Process notepad | ForEach-Object {$_.Kill()}, finds every notepad object and kills the program. In the first execution, there was no notepad object kept open, so the "Process not found" error is thrown. In the second attempt, with the notepad kept open, on executing the cmdlet, closes all the notepad programs that are open.
There may be instances where all similar processes may need not be directly stopped, in such instances the processes may be stopped based on some criteria.
Foreach Example
Foreach can be used in cases where the collection of objects is already ready, and not need be processed by another command.
Syntax:
Foreach(<variableName> in <collection of objects>)
{
<statements to be executed>
}
Example:
We will list out the elements from the C directory:
Foreach($element in Dir C:\ -recurse) { $ element.name };
Output: 
NOTE:
Initially when the command begins execution, there are some error messages thrown as the files cannot be accessed in the read mode and also the time taken for completing the command is higher comparatively as already said Foreach waits for the entire result and only then the output is displayed in the console.
The error screen looks similar to this,

Running Scripts
Similar to writing any code, write the PowerShell script in a separate file and save the same as “<fileName>.ps1”. The ‘1’ in the extension is for .Net framework. Until there are any compatibility issue PowerShell will continue with v1.0.
To run the script, go to the PowerShell console and input “. /<fileName>.ps1”. The first time you run the script, PowerShell throws error as no external code is allowed for execution, because of the default execution policy. Hence, set the security policy settings as mentioned above and then try running the script.
In PowerShell ISE, there is a separate script section, in which the script can be typed in. The commands typed are colored and hence increases the readability. As mentioned above, the script can be directly written in it and executed by clicking on the Run button in the top pane.
This looks similar to the one as in the below figure.
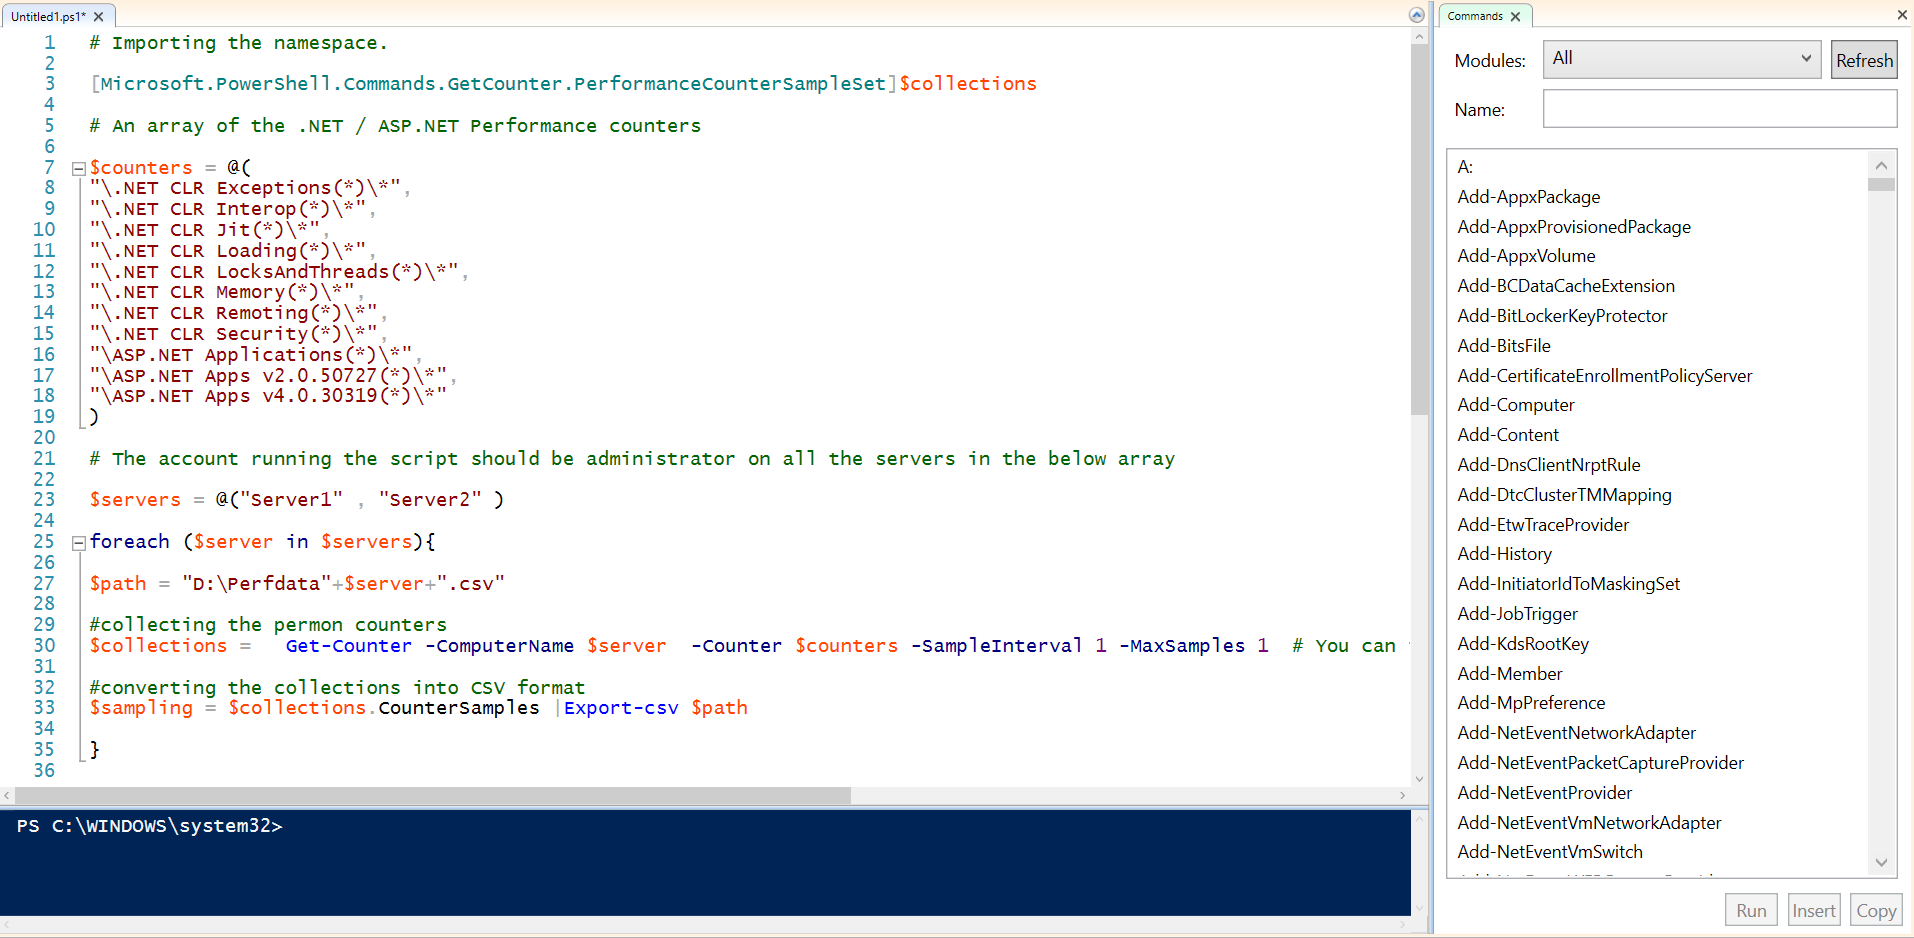
By using the above basic scripting knowledge, understood the below script and tried executing for gathering the counters that were collected by PerfMon in the client machine.
PowerShell Script:
======================================================================================
# Importing the namespace.
[Microsoft.PowerShell.Commands.GetCounter.PerformanceCounterSampleSet]$collections
# An array of the .NET / ASP.NET Performance counters
$counters = @(
"\.NET CLR Exceptions(*)\*",
"\.NET CLR Interop(*)\*",
"\.NET CLR Jit(*)\*",
"\.NET CLR Loading(*)\*",
"\.NET CLR LocksAndThreads(*)\*",
"\.NET CLR Memory(*)\*",
"\.NET CLR Remoting(*)\*",
"\.NET CLR Security(*)\*",
"\ASP.NET Applications(*)\*",
"\ASP.NET Apps v2.0.50727(*)\*",
"\ASP.NET Apps v4.0.30319(*)\*"
)
# The account running the script should be administrator on all the servers in the below array
$servers = @("Server1" , "Server2" )
foreach ($server in $servers){
$path = "D:\Perfdata"+$server+".csv"
#collecting the permon counters
$collections = Get-Counter -ComputerName $server -Counter $counters -SampleInterval 1 -MaxSamples 1 # You can increase the sample count and Sample Intervals
#converting the collections into CSV format
$sampling = $collections.CounterSamples |Export-csv $path
}
=====================================================================================
Modules
Modules are collection of PowerShell functionalities that are dynamic and persist on disk. In simple terms, Import-Module brings in the modules that are required for current session. There are some basic operations that can be performed without the needed module being explicitly imported. But for specific purposes the respective module has to be imported. Importing can be thought of including the header files in a program.
As seen above the list of available modules under IIS can be seen in the console.
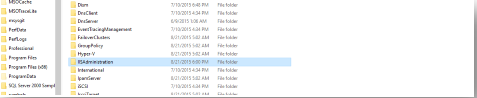
Also the list of all the modules can be seen in: C: > Windows > System32 > WindowsPowerShell > v1.0 > Modules
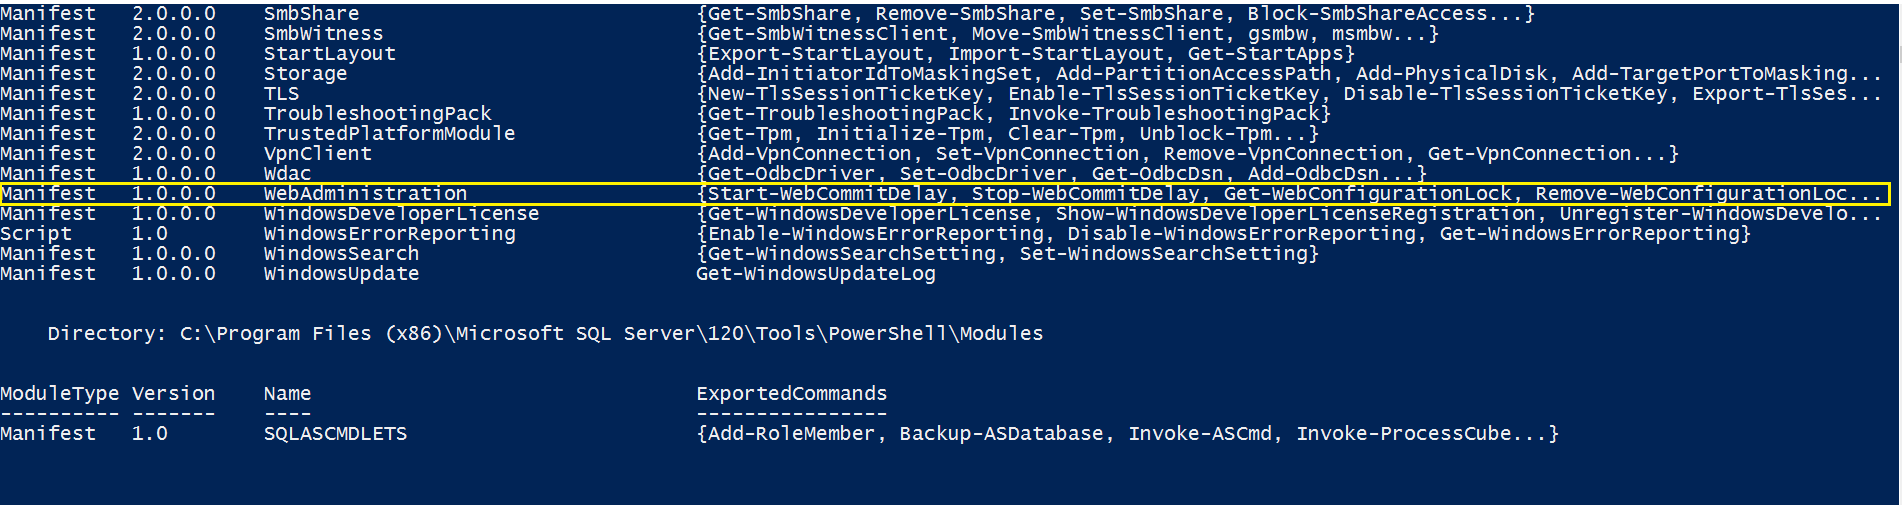
The above figure shows WebAdministration module that has got listed on running the Get-Module -ListAvailable
Connecting IIS and PowerShell
Let’s understand the value of PowerShell to IIS!!!
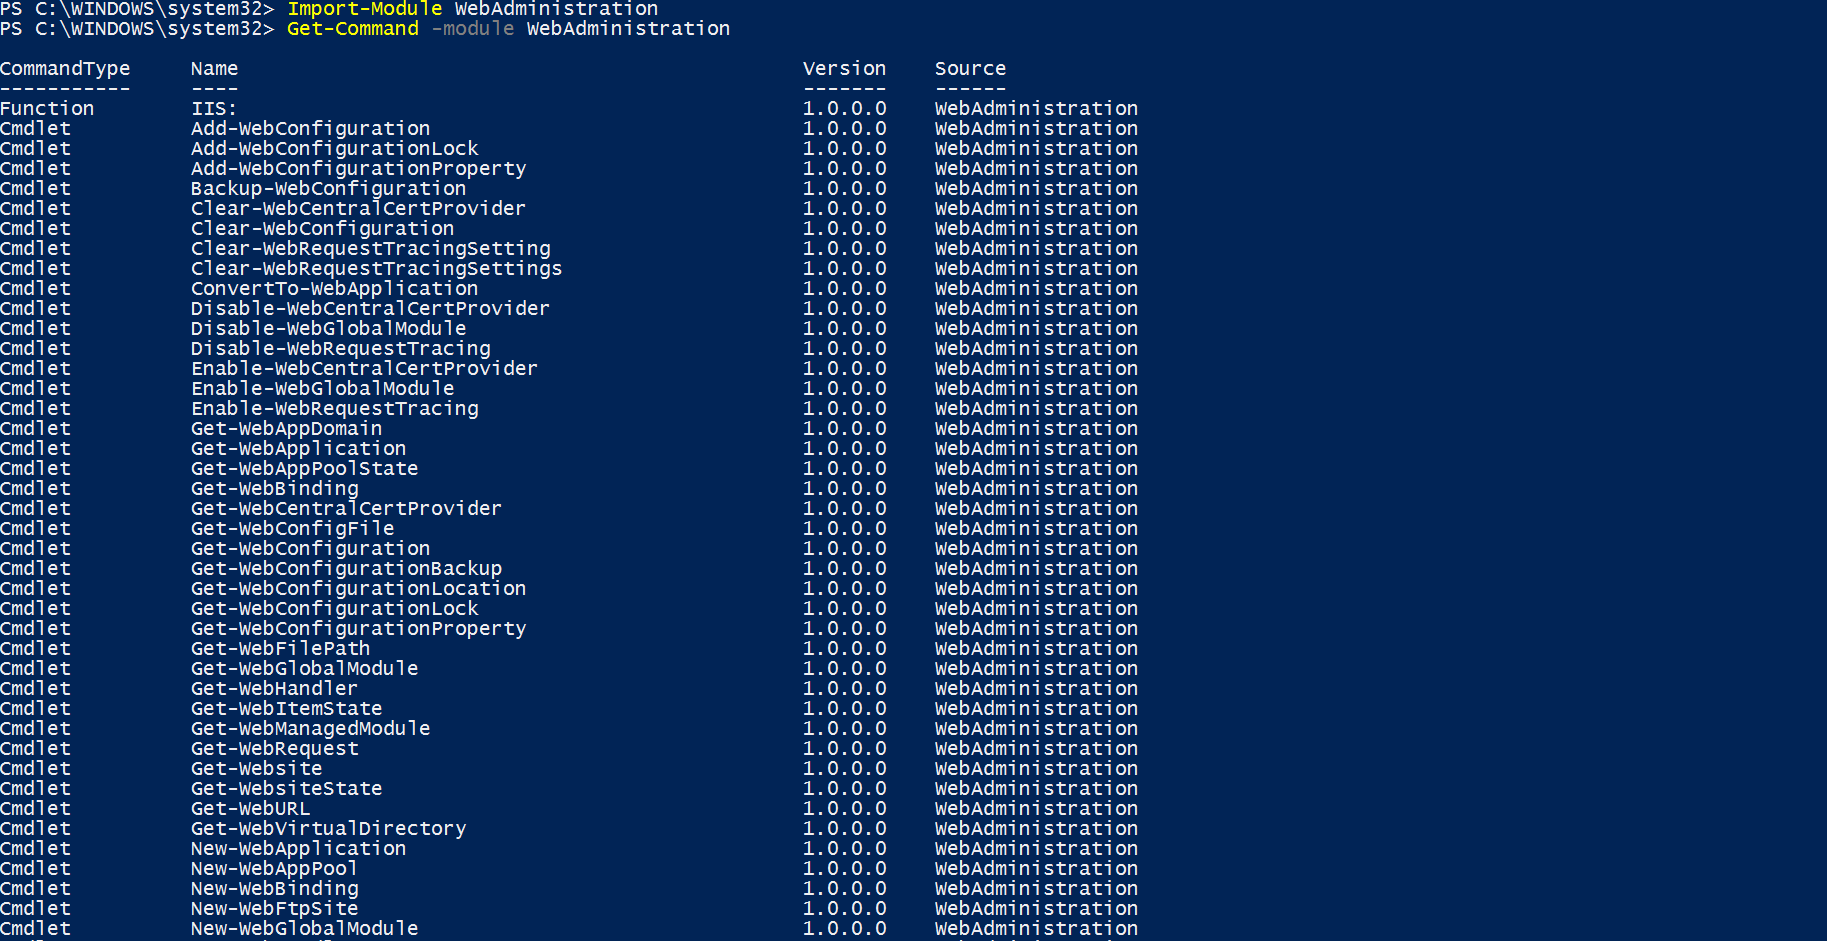
As seen above for a specific task to be done the corresponding module has to be imported. For IIS it is the WebAdministration module.

From an elevated PowerShell console (PowerShell run as administrator). By default, the path is set to Windows > System32. Leave the default setting as such and import the webadministration module so that IIS operations can be performed.
The module gets imported internally.
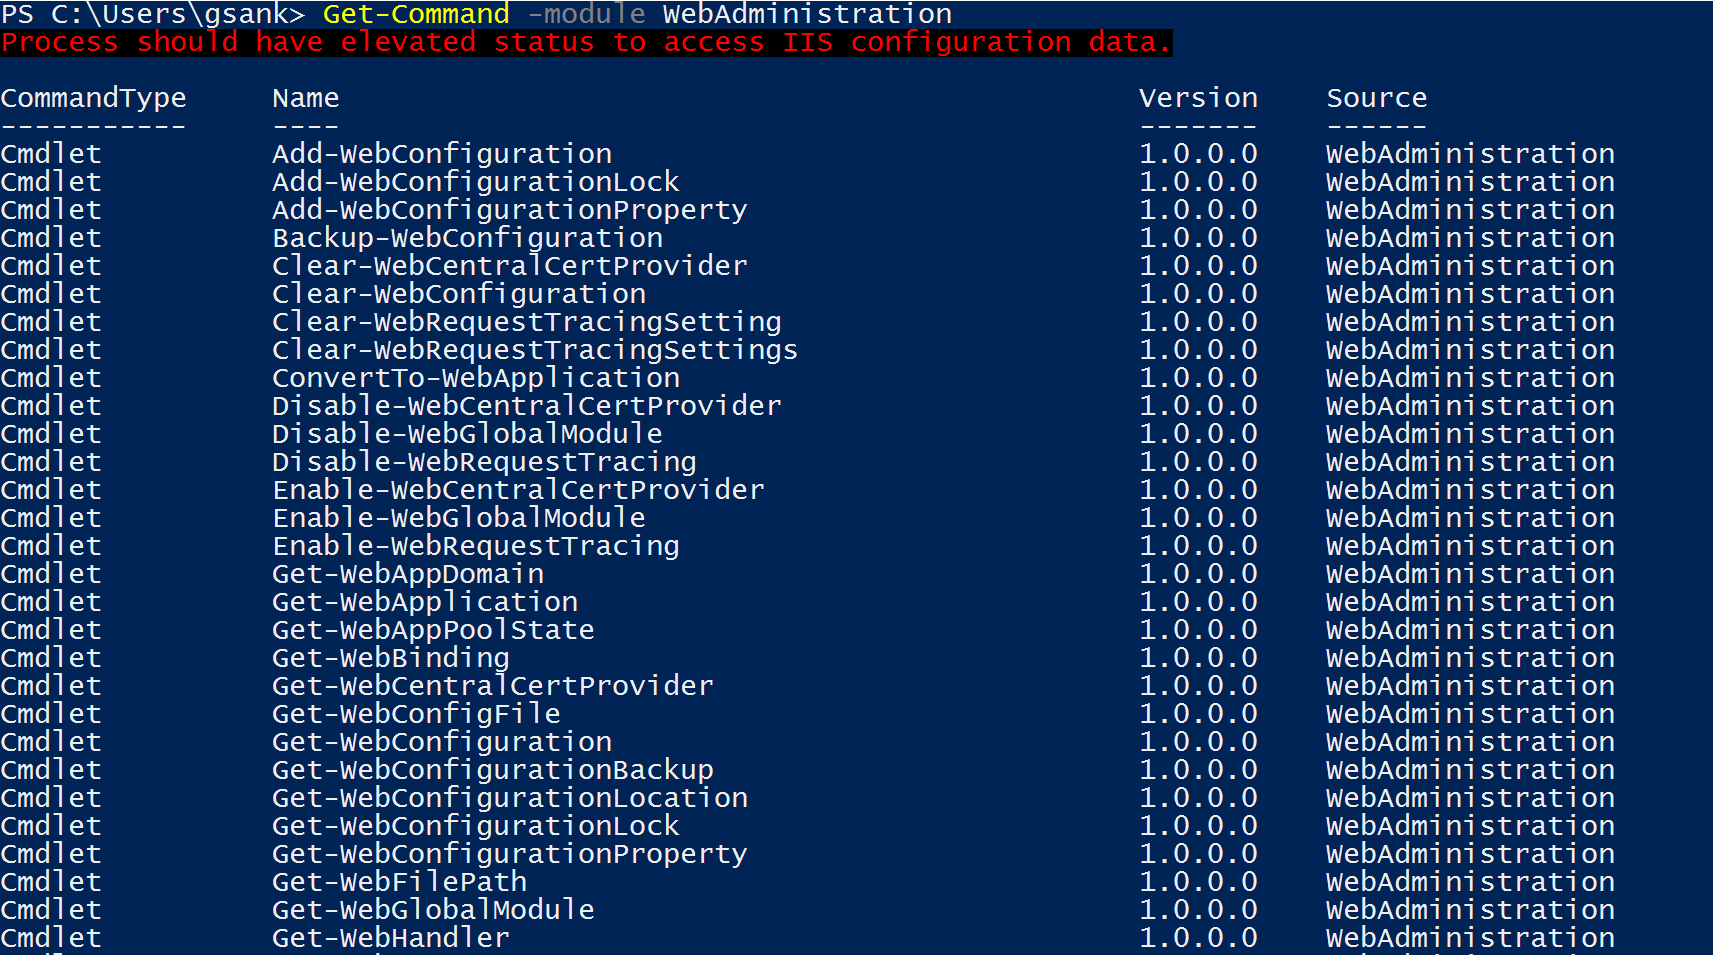
The above command lists all the commands that are use the WebAdministration module.

Here, you can observe that the directory has been moved to IIS. This is similar to opening the IIS application and working on it exclusively.

The "dir" command lists all the folders in the file
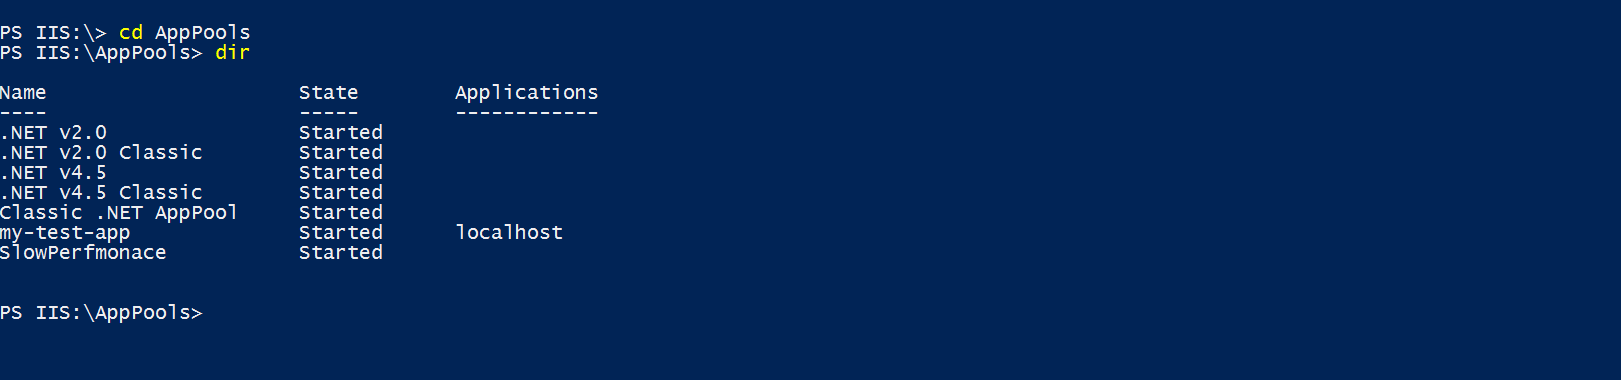
Move to the AppPools directory and the "dir" command, would display the list of application pools in it.
Want to see the lists of the Sites in the server ?, change the directory back to IIS, and enter the command "cd.." to move one level back

Change the directory to Sites and there you go !!, entering the "dir" command would list the directories in the Site folder.
Nothing fancy! Simple yet powerful!!
Now that we are able to see the contents, let’s create a website and add binding values to it

In the above command, new item is being created with binding details: "HTTP" and port "80".
Another example: 
Now we'll check if the change has been reflected in the IIS Manager

Yes, we have created a site through the PowerShell console and similar way the directory can be changed to AppPool and new application pools can be added. Magic can be done through the console and GUI is not needed separately!!!
Configuration Editor in IIS
Alternatively, if your brain feels you don't want allocate a static space for these commands, way is there for that to!
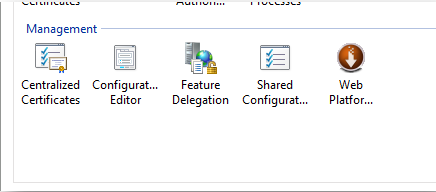
You can find the Configuration Editor as seen in the above figure, under the Management Section. The option is available both under the Site and the Server level.
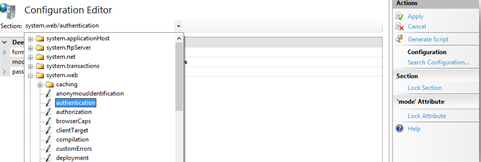
For our case, we will choose the server level setting. This is how the window looks like when, the Configuration Editor is opened. Click on Sections and there you see a list of options.
We will choose Authentication for our case.

Once Authentication is chosen the current settings under authentication gets listed.
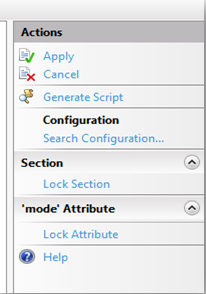
In the Actions pane in the left side, you will be able to see the Generate script enabled once the value is changed. Click on Generate Script.
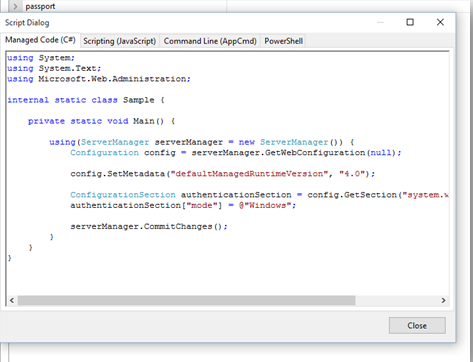
The script dialog pop up. Select the fourth tab, PowerShell.

Now you see the corresponding command to the operation performed, that is, we set the authentication set to windows and the corresponding PowerShell script got generated.
Alright, now we have made the authentication setting manually and where is this script going to help us!!! Suppose we have hundreds of servers and one change has to be replicated in all the servers and we don't know the exact PowerShell command to do the task, then, this becomes handy.
Write a small PowerShell script giving the command to be executed within a loop and PowerShell does the remaining task!!!
This is a very brief content about PowerShell!!! Try working on it and become a scriptophilic :)
Thanks for Reading!!! Enjoy Scripting :)